
Two years ago, I walked into school for pre-planning and was handed the Engage NY math curriculum. (The name changed to Eureka Math half way through the year.) We had four days to study and be ready to teach students. OH MY GOODNESS! I couldn't believe the amount of time preparing just one lesson took. How about all of the materials you and your students needed that weren't supplied?!? I will admit that I didn't teach each lesson from the modules that year because I didn't have the materials that I needed for each lesson. That was a VERY stressful year, and I knew that I couldn't go through another year like that one again. Last summer, I sat down and organized my math modules and created the materials my students and I needed. (To see my module materials, visit my TPT store, Fun in Room 428) Last year was my first year teaching the modules as directed, and because I was so organized, the year went well. I thought I would share how I organize my modules and lessons with you.
I wrote a grant and was able to purchase a few items to help me get started. I would suggest you do the same or you can make a request on Donors Choose or Go Fund Me.
 I purchased 4 hanging file boxes with lids, hanging files, and file folders. I put module 2 and 3 together along with 5 and 6. It saved me space only having 4 boxes. (I'll tell you about the blue tub beside the box later.)

 My first file holds a set of 5 group cards and 10 frames. Because they are used so much in the module, I keep them in front to make them easy to grab. This is the only piece of a lesson that I do not file with a lesson.


I wrote a grant and was able to purchase a few items to help me get started. I would suggest you do the same or you can make a request on Donors Choose or Go Fund Me.


In the front of my box, I keep the set of "I can" statements (get them here individually or in a bundle) and files with miscellaneous items I need for the module.


I also have my search the room, or walk the room activities. I made these as part of a game/activity pack to help my kids practice skills taught in module 1. I have a math shelf with activities that I made that I will share with you later.

The next file is a set of worksheets that I had or that I found online. I use them as supplements for extra practice, morning work, homework, or RTI.
Simply, all supplemental material and flashcards that are used constantly go in the front.

Now it's time for the lessons. I have a file folder for each lesson. The file contains a copy of the lesson and any materials that are needed for that lesson. Lesson 1, which is in the picture, is actually in a bag because there are pieces that I didn't want to lose.
I have teacher editions, but I keep a copy of the lesson with notes in the file because it's easier to pull out the copy to refer to as I'm teaching. (The blue socks came from The Dollar Tree, which is were a lot of my materials come from.)


 I quickly learned to leave everything I need, even if it's small items around the room in that lesson's folder. It's easier to just grab the math folder with all of your materials ready to go and then put them away after the lesson, ready to go for next year. I spent more money on card stock to be able to do this, but its worth the money. I tried sharing materials between lessons, but in the end, I couldn't remember the original lesson that the material went into.
 Make notes on the outside of the folders. The flip book referred to in lesson nine is part of my module materials packet.
For lesson 14, I made a note to teach this lesson over a two day period because it was introducing the addition and equal signs. I used the problem set for the first day and the homework as the problem set on the second day.
Making notes makes it easier to remember what and how to each next year.
 These are my "I can" statements that I keep in the front of the box ready to go for each module. There's an "I can" statement for each lesson and a page of new terms for each module.
I hope I have given you some good ideas to help organize your math modules and your lessons. I realize that teaching these modules can become overwhelming and time consuming. Keep checking back for more math posts.

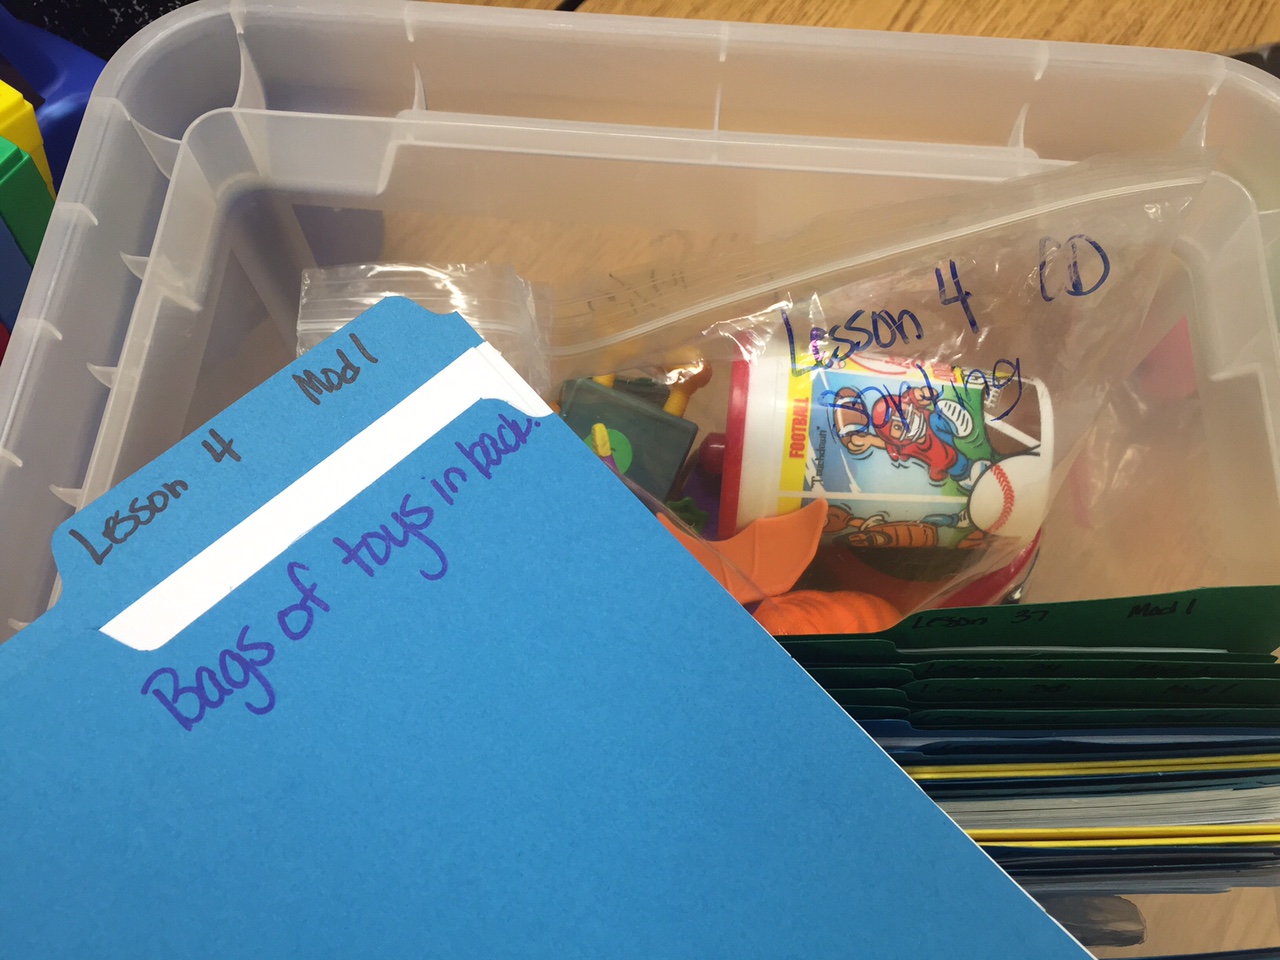
Bigger supplies go in a labeled bag in the back of the box with a written note on the outside of the file folder.
 I quickly learned to leave everything I need, even if it's small items around the room in that lesson's folder. It's easier to just grab the math folder with all of your materials ready to go and then put them away after the lesson, ready to go for next year. I spent more money on card stock to be able to do this, but its worth the money. I tried sharing materials between lessons, but in the end, I couldn't remember the original lesson that the material went into.
For lesson 14, I made a note to teach this lesson over a two day period because it was introducing the addition and equal signs. I used the problem set for the first day and the homework as the problem set on the second day.
Making notes makes it easier to remember what and how to each next year.

I hope I have given you some good ideas to help organize your math modules and your lessons. I realize that teaching these modules can become overwhelming and time consuming. Keep checking back for more math posts.


